
We have configured the CampusPress Flex theme to reflect current UCI branding. This is the new default theme and configuration. This theme is accessibility-ready with many customizations available. This guide will help you edit the pages so you can quickly get a website up and running!
Here are some tips to get the most out of this new theme.
Customize Your Website
All of these changes are done through the Customizer. You will need to be logged in and an Administrator on the website to be able to make these changes.
How to Open the Customizer
From the black Admin Menu at the top, click on Customize, or from the Dashboard go to Appearance > Customize

Header Settings
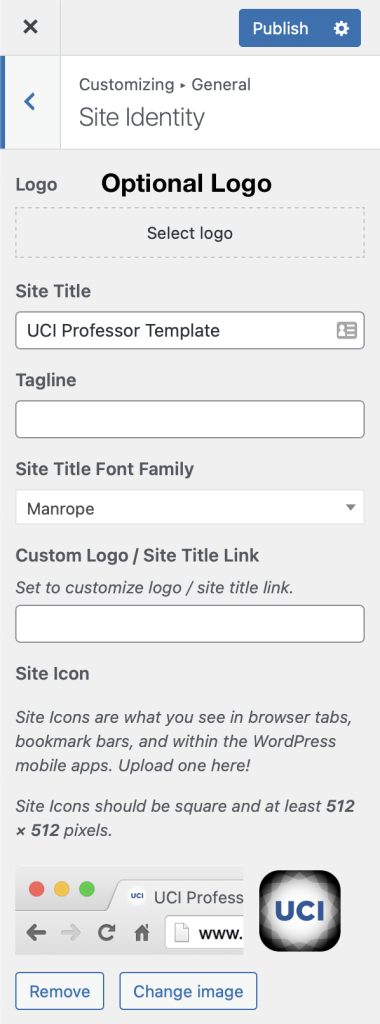
Site Identity Settings
The header includes the Site Title. It is usually your name or the name of your lab. You can change this at any time.
- From the Customizer, select General > Site Identity
- Use the Site Title field to change the text displayed in your header.
- Optionally, you can upload a logo that will replace the visibility of the text. (Click Select logo above Site Title to upload a logo image instead of using text.)
- Click Publish to publish the changes.
Main Header Settings
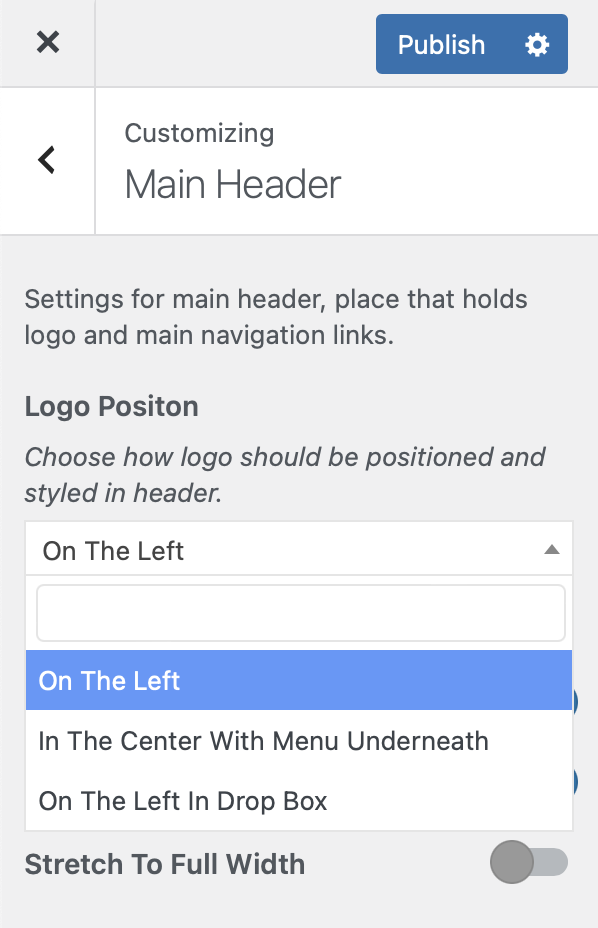
Logo Position
We have set up the sites to have the Logo or Site Title on the top left. However, you can change this to be centered with the menu underneath or on the left in a dropbox. To make changes to the logo position go to the Main Header section of the Customizer.
- From the Customizer, select Main Header.
- For Logo Position, decide where you want the Logo or Site Title to appear. You can preview what it will look like.
- You can also decide if you want to show a Search button, stick the menu to the top so it is always visible, and more.
- If you change this to “On The Left in Drop Box” you will need to adjust the colors so you can see the title.
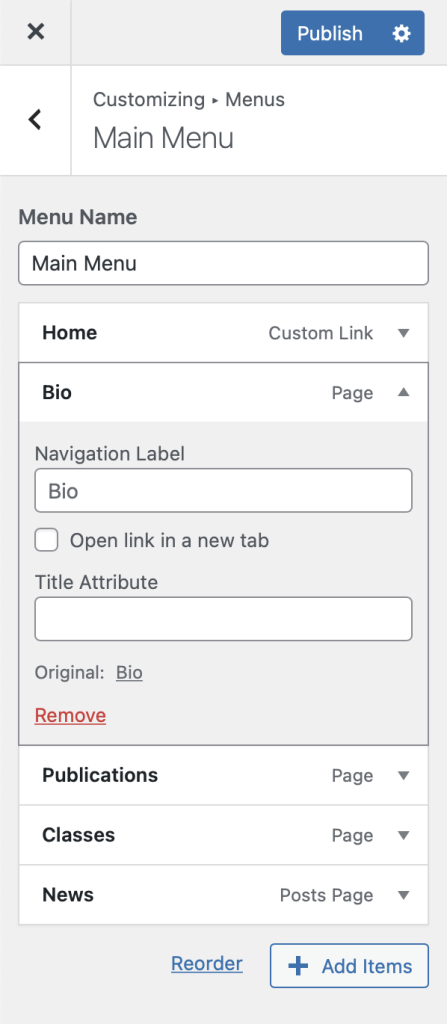
Main Menu
You can change the menu items that appear on the main header. We created some basic pages and linked them from the menu. However, you can add, remove, or reorder these at any time.
- From the Customizer, select Menus > Main Menu
- You can add, remove items, or reorder items.
- To add items, click the Add Items button at the bottom of the menu.
- To remove items, open the menu item by clicking on the title. Click the Remove link at the bottom of the Menu Item. You can also change the Navigation Label here. That is what gets displayed. (Note, this only removes the menu item to navigate to the page, it does not remove the page itself. See below for information on removing pages you don’t need.)
- To reorder, either drag and drop the menu item or click the Reorder link to use arrows to move the items up, down, or to the right to make a sub-menu item.
- Click Publish to publish any changes.
Secondary Header
We have used the secondary header section to include a menu to link to UCI and to your school. This is the menu with a dark blue background at the top of each page. This is a common user experience method to help readers know they are on a site that is part of a larger organization. This shows your readers that you are part of UCI and part of your school and gives them an easy way to navigate to those websites.

UCI School Menu
You can change the menu items that are displayed on the secondary header.
- From the Customizer, select Menus > UCI School Menu
- You can add, remove items, or reorder items.
- We are using Custom Links for the School and Department links.
- Change these menu items for your School and Department including the URL to their websites.
- If you do not want to use these, simply uncheck the menu from Menu Locations below or Delete the menu.
- Click Publish to publish any changes.

Footer
The footer contains a widget with contact information. You can either edit this information or remove the widget.
- From the Customizer, select Widgets.
- Select Footer Full.
- If this is the first time you are accessing Widgets you will see a Help screen. Click Got It when you are done reading. Proceed to edit the widget.
- There is one Paragraph block with the contact information. Edit this paragraph with your own information.
- If you do not want to use this widget, click the three dots and remove the paragraph block.
- Click Publish to save your changes.
Page Templates
We have created some sample pages for you. We have two types of websites: individual faculty websites and lab websites. They are similar but have different pages based on our analysis of the types of content that are common on each type of website. You can use these to help you get started quickly or delete them and create your own.
Home Page
The home page for both Individual and Lab websites includes the following elements. Feel free to add or remove any elements to customize it for your needs.
To edit the page, click Edit Page on the top administrative menu or look for the page in Pages > All Pages
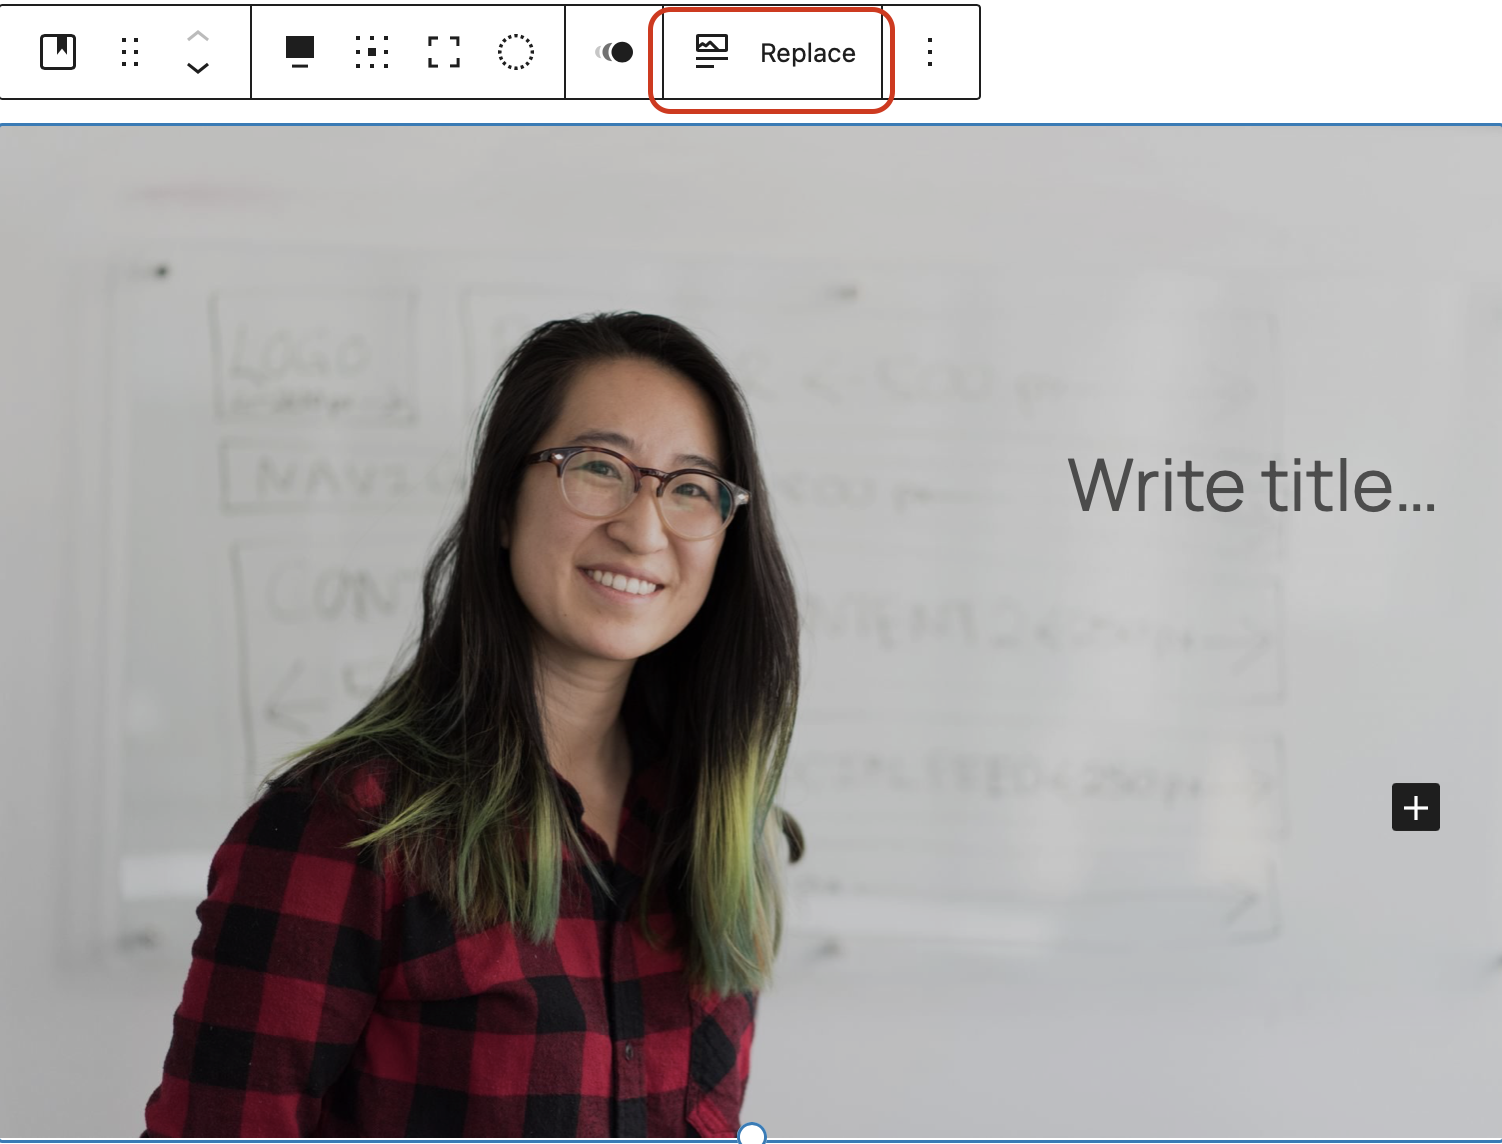
Cover Image
We have included a sample cover image.
- Click on the image. Make sure you are on the cover block.
- Click the Replace button and select an image from your media library or upload an image. A landscape image will work better.
- You can add a title that will appear over the photo. If you add text make sure there is enough contrast with the background photo to make it legible. This is important for web accessibility.
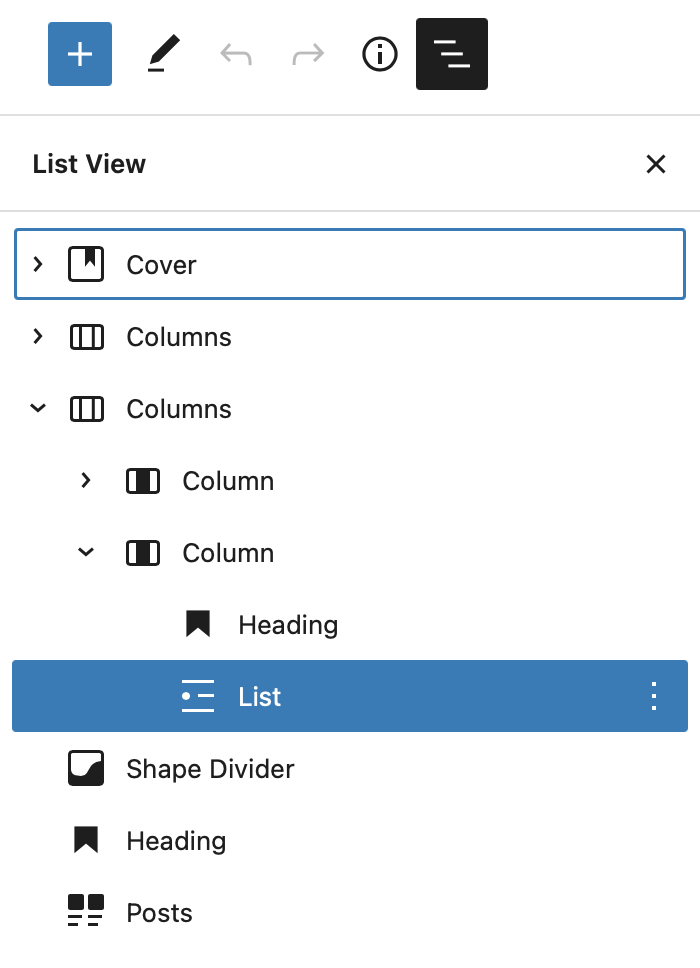
Quick Tip: At the top of the page, you will see a button for List View. This will give you a handy way of isolating each block to make changes.
Contact Information, Brief Bio, Key Research Areas, and Education (Individual Website)
Below the photo are two rows with two columns of content.
You can click on each block to make changes. If you want to remove a content block, click the three dots and click Remove block.
Introduction and Key Research Areas (Lab Website)
Below the photo is an introductory paragraph. Replace this with a brief introduction to who you are and what your lab focuses on.
Below that is a 3 column layout with Key Research Areas. These include a photo, a link to the Research page, and a brief description. This is an effective way to let your visitors know the type of research that your lab is working on.
News Section (Both)
The next section has a Posts block. This will display the latest Posts on your website. You can decide how many posts you want to show, what categories, what order, etc. If you do not use Posts on your website, you can remove this block. Currently, it will show the latest two Posts.
Save Changes
- Click the Update button in the top right to save and publish your changes.
Bio Page (Individual Website)
The Bio page has more biographical details. To edit the page, click Edit Page on the top administrative menu or look for the page in Pages > All Pages.
The page is divided into two columns.
- The left column has a photo and contact information. Edit this information with your own or remove the blocks by clicking on the three dots and choosing Remove.
- The right column has more biographical details. Edit this information with your own or remove the blocks.
Click the Update button when you are done to publish your changes.
Research (Lab Website)
The Research page is set up to share 3 sample research projects. This includes a description, a goal, and the impact. Replace the content and the images to share your current research. Remove anything you don’t need.
Publications (Both)
The Publications page is a simple page with examples of Journal Articles and Books. Edit the content as needed.
Click the Update button when you are done to publish your changes.
Classes (Individual Website)
The Classes page is another simple page where you can list any classes you are teaching.
Lab Members (Lab Website)
The Lab Members page has a layout to share photos and details of the folk who work in your lab. This includes the professor and the research assistants. It uses columns to place the image to the left of the details.
Contact Us (Lab Website)
The Contact Us page is a basic page with a way for people to contact you. Update the content to match your contact information. You can also add a contact form using the optional Formidable Forms plugin or even a Google Form. This can be a great way to hide your email so you don’t get spammed.
News (Both)
The News page is a special page that is set up to display your latest Posts. The content is displayed dynamically based on any content you have created in Posts.
What are Posts?
Posts are a separate content type. Posts are used for things like news, articles, or other timely content. They are generally displayed in reverse chronological order. You can use Categories and Tags to organize the content. Learn more about Posts and Pages.
Creating Posts is similar to pages. To create a new Post, simply choose Post from the New > Post menu at the top or from Posts > Add New in the Dashboard.
As you create and publish new Posts, they will appear on your News page.
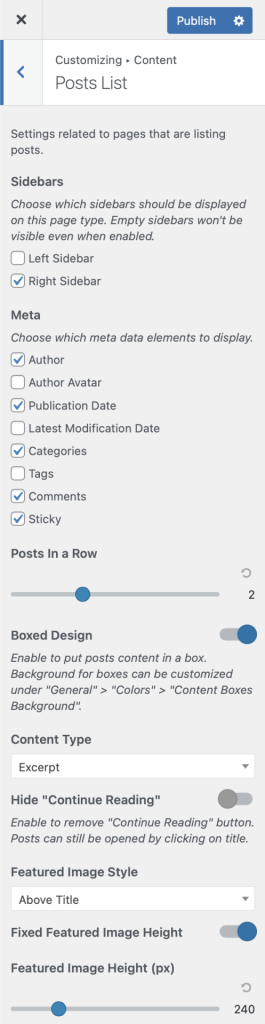
Change how News Posts are Displayed
You can change how the News Posts are displayed from the Customizer.
- From the Customizer, select Content > Posts List
- Modify the settings to suit your needs. You will see the changes displayed to the right in the preview.
- When you are done, click Publish to save your changes.
How to remove the News page
If you don’t want to have a News section or use Posts, you can remove the page and the menu item.
- First, change the Homepage Settings to deselect the Posts page.
- From the Customizer, select Homepage Settings.
- From the Posts page setting, change it to simply “Select to” choose none.
- Click Publish
- Second, remove News from the menu.
- From the Customizer, select Menus > Main Menu
- Click the News item to expand the options and click Remove
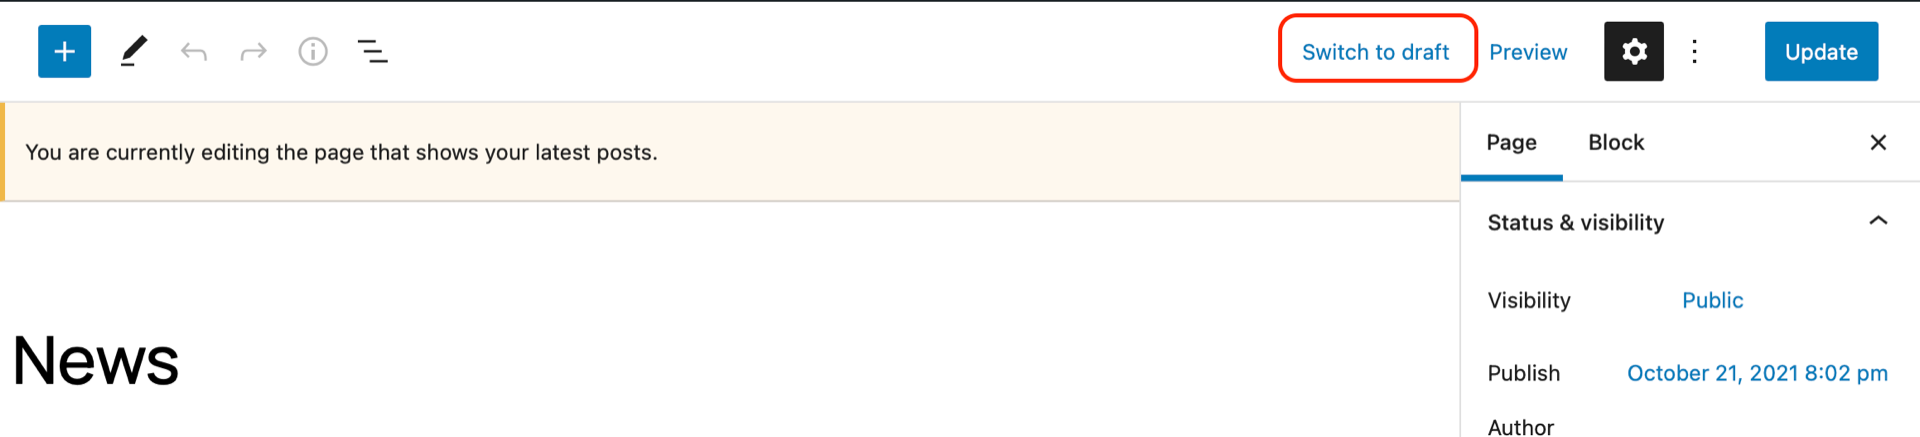
- Third, unpublish the News page.
- Go to Pages > All Pages
- Click Edit
- Click Switch to draft at the top of the edit page.
How to Remove Pages
We have included sample pages, but if you don’t want to use these, it is simple to unpublish them or delete them.
- Go to Pages > All Pages
- To Delete the page, hover over the title and click Trash.
- This will move the page to the Trash. It will stay there for 30 days before being removed permanently.
- If you did this accidentally, click Undo. You can also select the Trash filter at the top and Restore the page.
- If you want to keep the page, but not have it published, you can change it to a Draft.
- In Edit mode, click Switch to Draft at the top. This will unpublish the page but you will not lose the content.
If you have removed pages, remember to also remove them from your Menu.
Learn more about the CampusPress Flex Theme
CampusPress has an extensive guide that will help you with the many options available with this theme.