We are conducting our annual inventory to identify inactive websites on Faculty Websites. This process helps us maintain an efficient and up-to-date platform for our community.
What You Need to Know
Inactive websites are those that have not been updated in more than 2 years.
If a site has not been updated in the past 2 years, we will be contacting the site owners to see if they still want to keep the website active. If you regularly update your website, no other action is needed. Your site will be considered “active”.
We will be archiving any remaining inactive sites on or after March 31, 2025. Don’t worry, archived sites can be reactivated at any time upon request.
How to Keep Your Site Active
Log in to your site regularly and update your content. This can be either by editing existing content and publishing the changes, or creating new content.
Questions
Why do you archive sites?
We want to make sure that the sites we host are still needed. Sites are easy to create, so sometimes people create sites and either never use them or haven’t used them in years. People also leave UCI either because they find a new job or retire. We have been running this service for 14 years. Over that time, many of the original sites have been abandoned. By archiving the inactive sites, we can help make sure the information on the websites stays up to date and relevant. We are thrilled if you want to keep using the service. We will happily keep any site active by request or simply update the content on a regular basis, and it will always stay active.
What if I’m no longer at UCI or I have retired?
Your access to editing the site is provided by your UCInetID. While you are an active employee, you should have access to your site. However, after that time, you will no longer be able to log in to make changes. We can export your site’s content upon request. Learn more about UCInetID Deletion Policies.
Help! I missed the email and my website has been archived.
No need to worry. We can easily unarchive your site and return it to its previous state. Contact us! We’re here to help.
We’re here to help! If you have any questions or concerns, please don’t hesitate to contact us.
April Update
We have completed our Annual Inventory of Faculty Websites.
In late-January, we sent an email out to 466 website owners letting them know that their sites had not been updated in 2 or more years.
We sent out reminders on March 19th to owners who had not yet updated their websites.
On April 3, 2025, we archived 168 sites that were still inactive.
If your site was archived, but you want it re-activated, please contact us. We’d be more than happy to restore it to an active status.
We will be closed for Winter Break from December 24, 2024 to January 1, 2025. During this time, our Web Services staff will be unavailable to provide support.
If you need technical assistance with your website during the closure, please contact CampusPress directly using one of the following methods:
Join the Office of Equality Opportunity and Diversity (OEOD) UCI and Siteimprove on Thursday, December 5, 2024 from 11:00 AM to 11:45 AM to learn more about web accessibility. Siteimprove will be hosting an informative session at UCI focusing on the latest trends in website accessibility. This session will address campuswide accessibility issues identified through manual and automated testing by Siteimprove.
Web accessibility is crucial, especially in higher education, because it ensures that all students, faculty, and staff, regardless of their abilities, have equal access to digital resources and information. In an academic setting, where learning and engagement heavily rely on digital platforms, accessible websites enable individuals with disabilities to participate fully in educational opportunities, access course materials, and engage with the campus community. By prioritizing web accessibility, institutions not only comply with legal standards but also foster an inclusive environment that values diversity and innovation. This commitment to accessibility empowers all members of the academic community to achieve their full potential and contributes to a more equitable society.
Agenda Highlights
Resize Text (Level AA): Ensuring that pages are readable and functional when text is enlarged up to 200%. We will discuss both 200% browser zoom and text resize.
Reflow (Level AA): Page content should reflow within a viewport of 256 by 320 CSS pixels when users zoom in up to 400%.
Non-text Contrast (Level AA): User interface controls and essential graphic elements must have a color contrast ratio of 3:1. We will focus on non-text content such as link underline colors and focus indicators.
Info and Relationships (Level A): Structure, information, and relationships should be programmatically determined or available as text, with a focus on headings.
Link Purpose (In Context) (Level A): Links should indicate when they open in a new window or tab. We will discuss handling links that open new windows without warning.
Non-text Content (Level A): All images, CAPTCHA elements, and other non-text content must have accurate text-based alternatives. We will address issues like incorrect conveyance of characters such as arrows for screen-reader users.
Screen Reader Demonstration: A thorough demonstration using JAWS and/or NVDA on desktop will be provided.
As faculty members at UCI, you all know how important it is to provide an inclusive learning environment for your students. But did you know that accessibility extends beyond the physical classroom and also includes digital products like websites and apps? By designing these products to be accessible, we ensure that everyone, including people with disabilities, can access and use digital information and services just like everyone else. This is crucial because when websites and apps aren’t accessible, it can limit opportunities for education, employment, and social interaction for people with disabilities. At UCI, we are committed to making our digital products accessible to everyone, and it’s our responsibility as website owners to ensure that we do so. To learn more about UCI’s Accessibility policy and guidelines, visit the Accessibility website.
Plugins
UCI Sites has some plugins available to help you make your WordPress site more accessible. While these won’t guarantee your website will be accessible, they can help you achieve your accessibility goals. Find these plugins in the Plugins > All Plugins area of your dashboard. You will need to be an administrator on a site to activate these.
Accessibility (WP Accessibility)
The WP Accessibility plugin helps with a variety of common accessibility problems in WordPress themes. It adds a number of helpful accessibility features that can be enabled or disabled based on your theme’s needs.
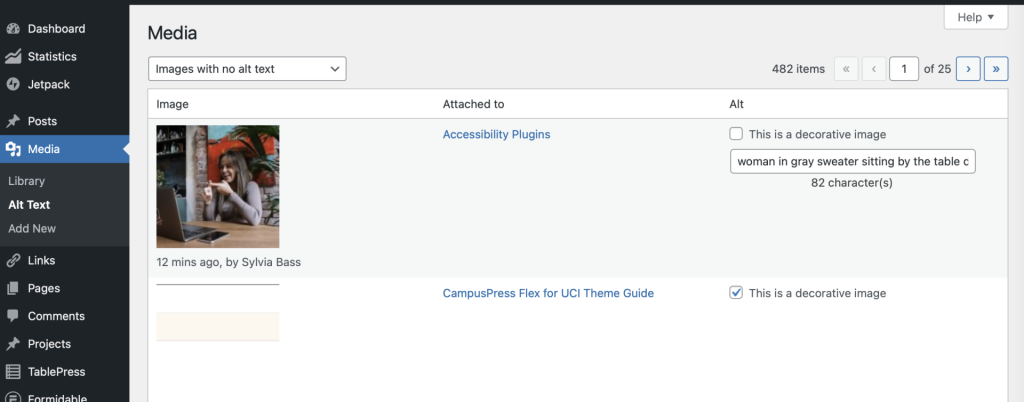
Check your pages and posts for potential accessibility issues and get help with ensuring your content is accessible. This tool also makes it easy to check your media uploads to make sure you are using Alternative (ALT) text. You will see a new “Alt Text” menu option in the Media section.
Divi Accessibility
If you are using the Divi theme or Divi plugin, make sure to activate Divi Accessibility. This plugin improves Divi accessibility in accordance with WCAG 2.0 guidelines.
SiteImprove to Check Your Site
UCI has licensed the SiteImprove tool to help you check for accessibility issues on your site. SiteImprove is a web-based tool that helps website owners improve their websites to make them easier to use for everyone, including people with disabilities. It does this by checking your website for issues that might make it difficult for people with disabilities to use, like small text, missing descriptions of pictures, or buttons that are hard to click on. If it finds any issues, SiteImprove gives you advice on how to fix them, so your website becomes more inclusive and user-friendly. With SiteImprove, you can make sure your website is accessible to as many people as possible, regardless of their abilities.
We have recently learned that all website tracker tools, including Meta Pixel and Google trackers, must be disabled on all websites related to UCI Health or UCI School of Medicine by September 26, 2022.
This is due to a recommendation from the UC Regents. An email was sent from Dean Michael Stamos in the School of Medicine.
At this time, UC Regents has recommended that all website tracker tools, including Meta Pixel and Google trackers, be disabled on all websites related to UCI Health or UCI School of Medicine. That includes those sites managed or maintained by UCI or UCI Health, and all sites managed or maintained by outside companies.
All trackers must be disabled by September 26 to be in compliance with the UC Regents’ directive. We will conduct a thorough review following the September 26 deadline to verify compliance.
Dean Michael Stamos
Disabling Google Analytics on Your Website
We provide Google Analytics at the network level to all websites that we host. This allows you to see basic analytics on your dashboard to see what content is most popular.
You can now disable Google Analytics tracking on your individual website. CampusPress has created a plugin that allows you to block network tracking. See the instructions below to Activate the plugin to block Google Analytics tracking.
Frequently Asked Questions
How can we disable Google Analytics on our UCI Health or School of Medicine websites hosted on Faculty Websites to be in compliance?
We have been working with the Communication offices in UCI Health and the School of Medicine. We have disabled tracking on about 88 websites for faculty in the School of Medicine. However, if your site is affected, it is possible we missed it if was unknown to be a part of UCI Health or School of Medicine. You can still disable tracking by following the directions below.
We now have a plugin that allows site administrators to disable Google Analytics tracking. Follow the steps below to disable Google Analytics on your individual website.
Log in to your website as an administrator
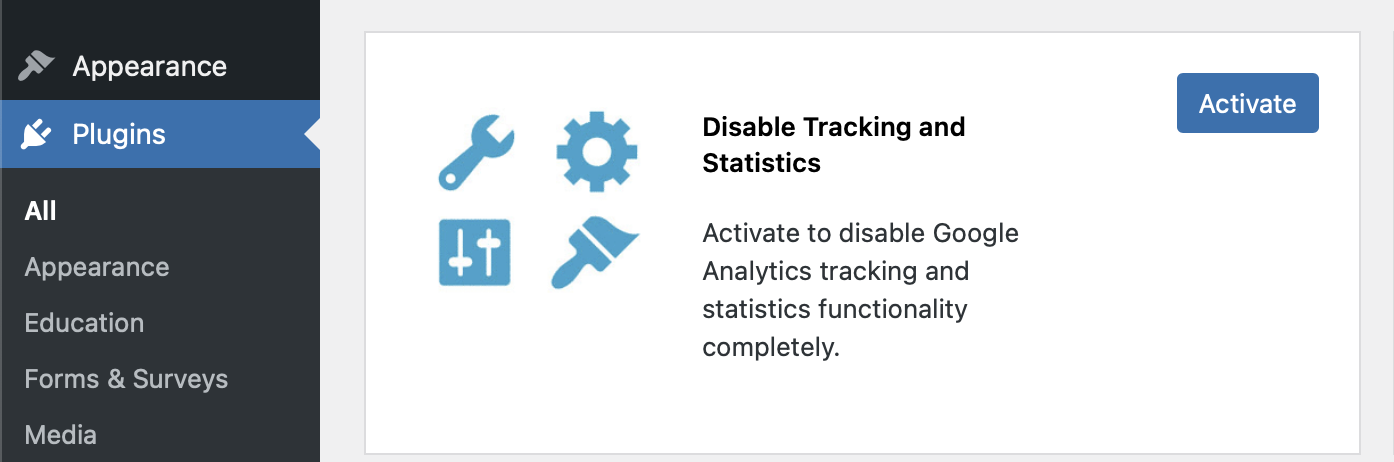
Go to the Plugins menu on the Dashboard
Look for “Disable Tracking and Statistics“. (You can also use the Search field)
Click the Activate button
That’s it! Google Analytics will no longer be able to track your website.
You will also no longer see the Visitors panel in your Dashboard or the Statistics + GTM settings in the left menu of the Dashboard.
How can I confirm that Google is not tracking my website anymore?
You can try using either Firefox or Safari. Both have a privacy tracker built in. Make sure you are logged in if you just activated the plugin. The non-logged in view will be cached and may take 15 minutes or so to show the changes to the public.
Safari
Using Safari, visit your website.
Click the shield icon to the left of the URL field.
Safari will show how many trackers are used on the website.
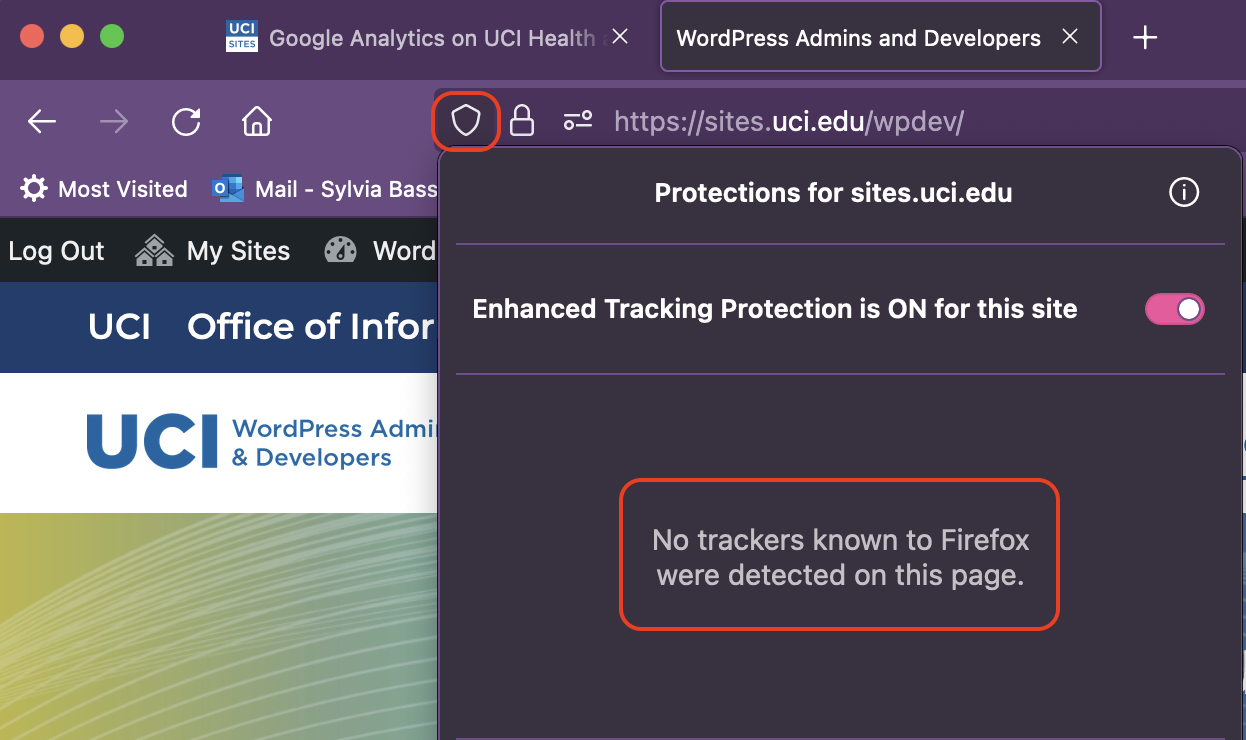
Firefox
Using Firefox, visit your website.
Click the shield icon to the left of the URL field.
Firefox will show how many trackers are used on the website.
Is Google Analytics still allowed on other UCI websites that are not related to UCI Health or Medicine?
As of now, yes. We will update this article if the policy changes to extend to all UCI websites.
Is Meta Pixel enabled? How do I disable or remove that?
Meta Pixel is a snippet of JavaScript code that allows you to track visitor activity on your website. Meta is the parent company of Facebook and Instagram. It is not installed or enabled on Faculty Websites.
Using Meta Pixel requires setting up an account with Meta and adding code into the <head> section of your website using a plugin like “Advanced Settings”. If you don’t know what this is, it is highly unlikely you have it on your website. It would require that you or another site administrator set it up.
Can I still use Jetpack Site Stats on UCI Health or School of Medicinewebsites?
No, we would not recommend it.
The email from Dean Stamos stated all trackers must be disabled on UCI Health and School of Medicine websites. While Jetpack was not named, it is best to err on the side of caution and not use Jetpack Site Stats. Jetpack is an optional plugin that is not enabled or configured by default. If you are not using Jetpack, you do not have to do anything as it will not be running on your website.
If you are using Jetpack, Site Stats is ON by default. You can disable it by following the directions below.
How to Disable Jetpack Site Stats
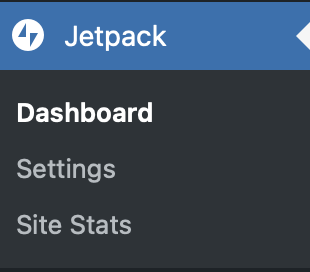
Go to the Jetpack > Dashboard menu in the left sidebar of your Dashboard.
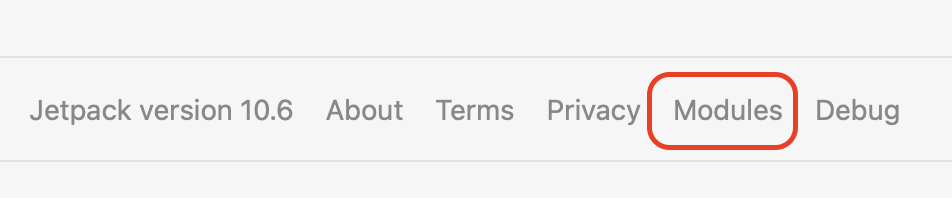
At the bottom of the page, look for Modules in the list of Jetpack links.
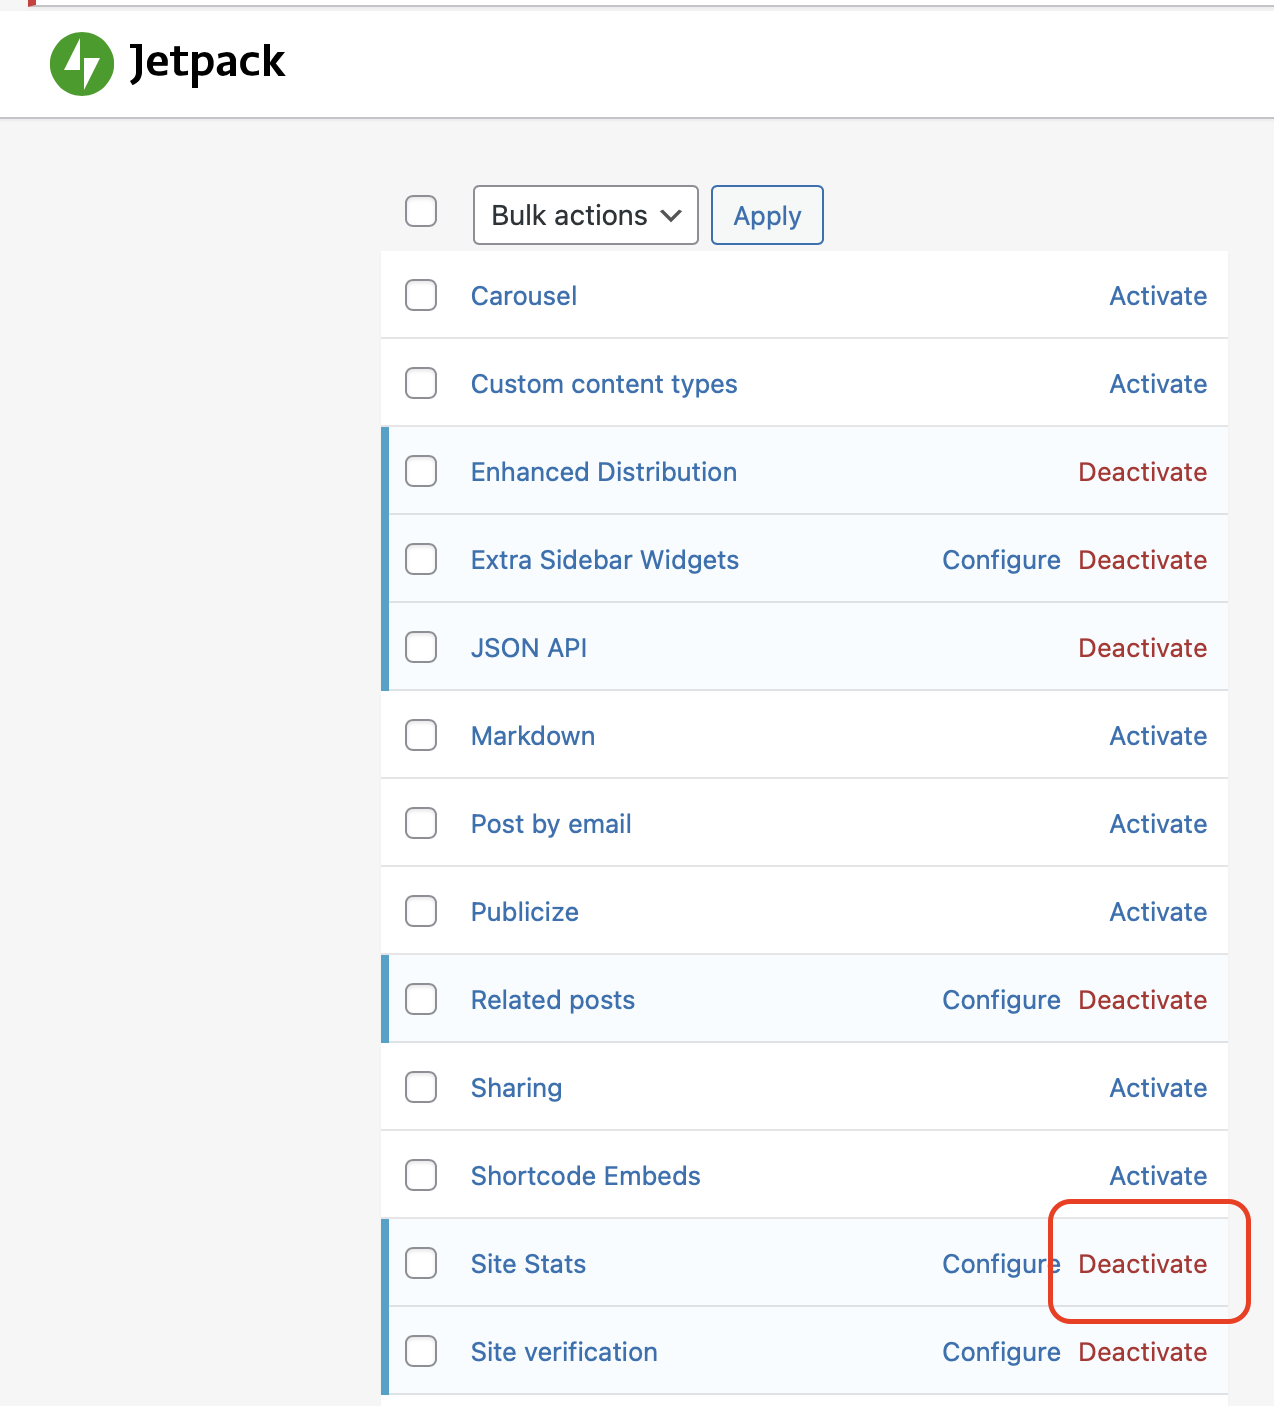
Click Deactivate in the Site Stats row.
Site Stats in Jetpack will now be deactivated. The site will no longer track visitors using Jetpack, nor will the Site Stats module be displayed on the dashboard.