As faculty members at UCI, you all know how important it is to provide an inclusive learning environment for your students. But did you know that accessibility extends beyond the physical classroom and also includes digital products like websites and apps? By designing these products to be accessible, we ensure that everyone, including people with disabilities, can access and use digital information and services just like everyone else. This is crucial because when websites and apps aren’t accessible, it can limit opportunities for education, employment, and social interaction for people with disabilities. At UCI, we are committed to making our digital products accessible to everyone, and it’s our responsibility as website owners to ensure that we do so. To learn more about UCI’s Accessibility policy and guidelines, visit the Accessibility website.
Plugins
UCI Sites has some plugins available to help you make your WordPress site more accessible. While these won’t guarantee your website will be accessible, they can help you achieve your accessibility goals. Find these plugins in the Plugins > All Plugins area of your dashboard. You will need to be an administrator on a site to activate these.
Accessibility (WP Accessibility)
The WP Accessibility plugin helps with a variety of common accessibility problems in WordPress themes. It adds a number of helpful accessibility features that can be enabled or disabled based on your theme’s needs.
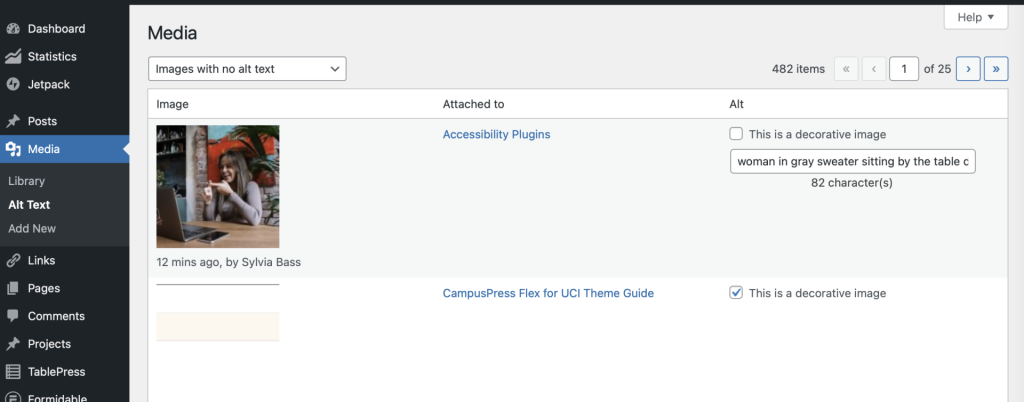
Check your pages and posts for potential accessibility issues and get help with ensuring your content is accessible. This tool also makes it easy to check your media uploads to make sure you are using Alternative (ALT) text. You will see a new “Alt Text” menu option in the Media section.
Divi Accessibility
If you are using the Divi theme or Divi plugin, make sure to activate Divi Accessibility. This plugin improves Divi accessibility in accordance with WCAG 2.0 guidelines.
SiteImprove to Check Your Site
UCI has licensed the SiteImprove tool to help you check for accessibility issues on your site. SiteImprove is a web-based tool that helps website owners improve their websites to make them easier to use for everyone, including people with disabilities. It does this by checking your website for issues that might make it difficult for people with disabilities to use, like small text, missing descriptions of pictures, or buttons that are hard to click on. If it finds any issues, SiteImprove gives you advice on how to fix them, so your website becomes more inclusive and user-friendly. With SiteImprove, you can make sure your website is accessible to as many people as possible, regardless of their abilities.
We have recently learned that all website tracker tools, including Meta Pixel and Google trackers, must be disabled on all websites related to UCI Health or UCI School of Medicine by September 26, 2022.
This is due to a recommendation from the UC Regents. An email was sent from Dean Michael Stamos in the School of Medicine.
At this time, UC Regents has recommended that all website tracker tools, including Meta Pixel and Google trackers, be disabled on all websites related to UCI Health or UCI School of Medicine. That includes those sites managed or maintained by UCI or UCI Health, and all sites managed or maintained by outside companies.
All trackers must be disabled by September 26 to be in compliance with the UC Regents’ directive. We will conduct a thorough review following the September 26 deadline to verify compliance.
Dean Michael Stamos
Disabling Google Analytics on Your Website
We provide Google Analytics at the network level to all websites that we host. This allows you to see basic analytics on your dashboard to see what content is most popular.
You can now disable Google Analytics tracking on your individual website. CampusPress has created a plugin that allows you to block network tracking. See the instructions below to Activate the plugin to block Google Analytics tracking.
Frequently Asked Questions
How can we disable Google Analytics on our UCI Health or School of Medicine websites hosted on Faculty Websites to be in compliance?
We have been working with the Communication offices in UCI Health and the School of Medicine. We have disabled tracking on about 88 websites for faculty in the School of Medicine. However, if your site is affected, it is possible we missed it if was unknown to be a part of UCI Health or School of Medicine. You can still disable tracking by following the directions below.
We now have a plugin that allows site administrators to disable Google Analytics tracking. Follow the steps below to disable Google Analytics on your individual website.
Log in to your website as an administrator
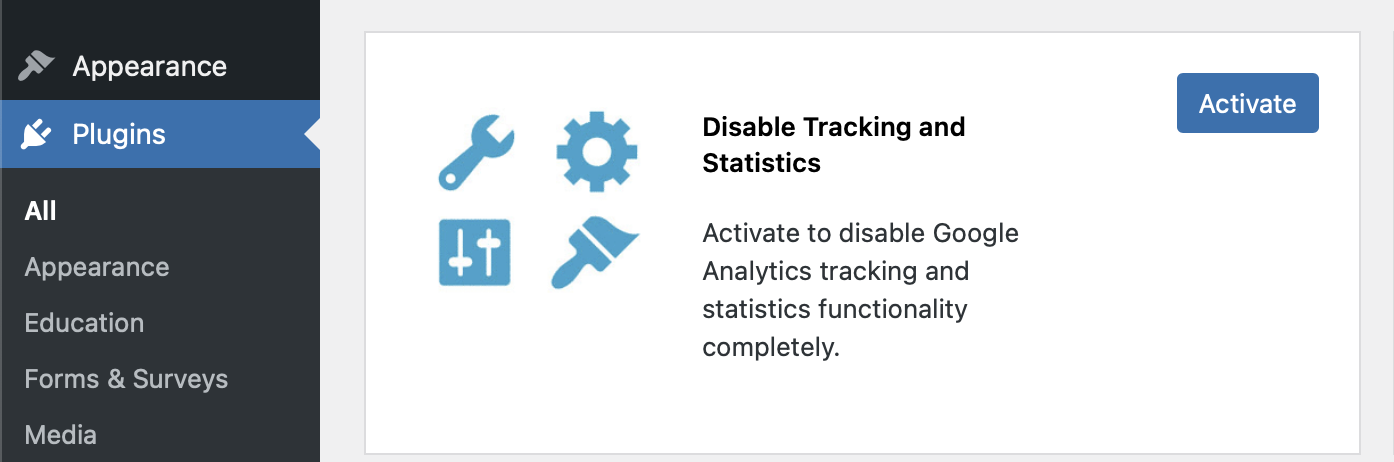
Go to the Plugins menu on the Dashboard
Look for “Disable Tracking and Statistics“. (You can also use the Search field)
Click the Activate button
That’s it! Google Analytics will no longer be able to track your website.
You will also no longer see the Visitors panel in your Dashboard or the Statistics + GTM settings in the left menu of the Dashboard.
How can I confirm that Google is not tracking my website anymore?
You can try using either Firefox or Safari. Both have a privacy tracker built in. Make sure you are logged in if you just activated the plugin. The non-logged in view will be cached and may take 15 minutes or so to show the changes to the public.
Safari
Using Safari, visit your website.
Click the shield icon to the left of the URL field.
Safari will show how many trackers are used on the website.
Firefox
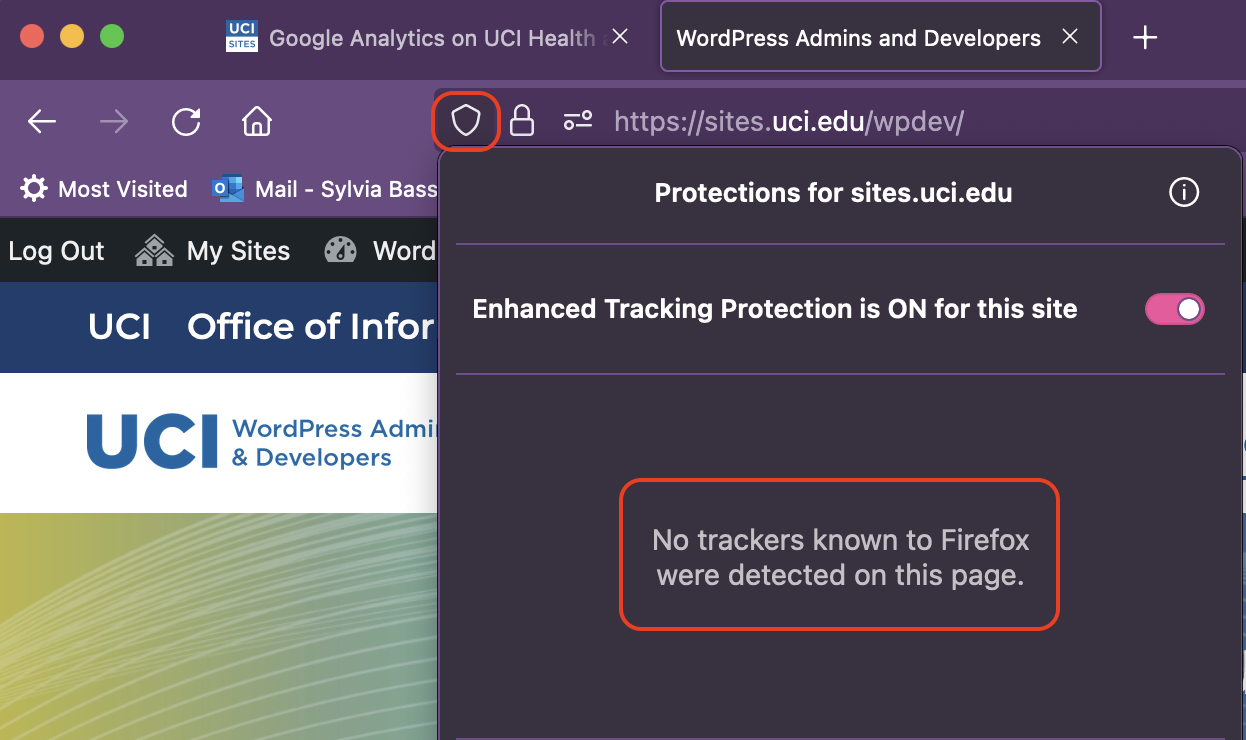
Using Firefox, visit your website.
Click the shield icon to the left of the URL field.
Firefox will show how many trackers are used on the website.
Is Google Analytics still allowed on other UCI websites that are not related to UCI Health or Medicine?
As of now, yes. We will update this article if the policy changes to extend to all UCI websites.
Is Meta Pixel enabled? How do I disable or remove that?
Meta Pixel is a snippet of JavaScript code that allows you to track visitor activity on your website. Meta is the parent company of Facebook and Instagram. It is not installed or enabled on Faculty Websites.
Using Meta Pixel requires setting up an account with Meta and adding code into the <head> section of your website using a plugin like “Advanced Settings”. If you don’t know what this is, it is highly unlikely you have it on your website. It would require that you or another site administrator set it up.
Can I still use Jetpack Site Stats on UCI Health or School of Medicinewebsites?
No, we would not recommend it.
The email from Dean Stamos stated all trackers must be disabled on UCI Health and School of Medicine websites. While Jetpack was not named, it is best to err on the side of caution and not use Jetpack Site Stats. Jetpack is an optional plugin that is not enabled or configured by default. If you are not using Jetpack, you do not have to do anything as it will not be running on your website.
If you are using Jetpack, Site Stats is ON by default. You can disable it by following the directions below.
How to Disable Jetpack Site Stats
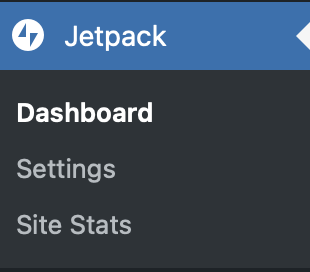
Go to the Jetpack > Dashboard menu in the left sidebar of your Dashboard.
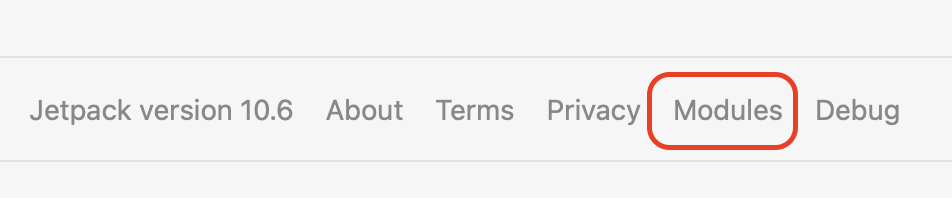
At the bottom of the page, look for Modules in the list of Jetpack links.
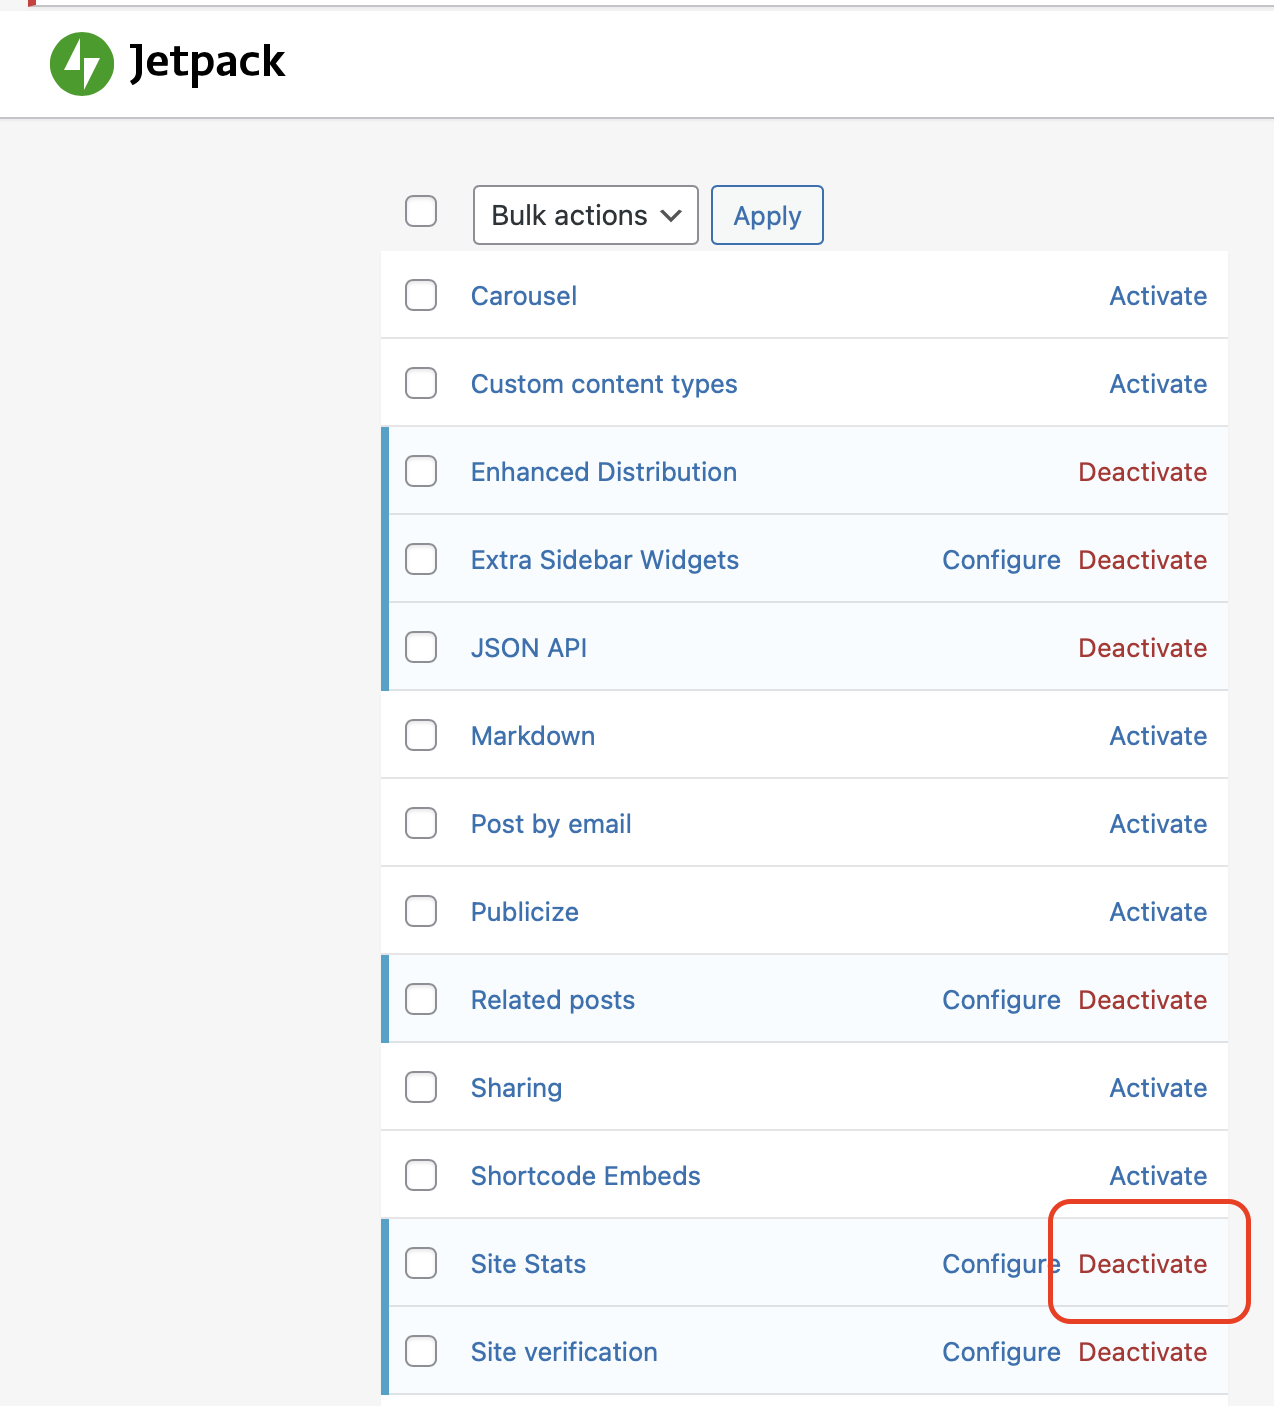
Click Deactivate in the Site Stats row.
Site Stats in Jetpack will now be deactivated. The site will no longer track visitors using Jetpack, nor will the Site Stats module be displayed on the dashboard.
In an earlier post, we shared a variety of websites where you can find royalty-free images for your website or blog. Before adding images to your website, make sure you have permission to use them. If you don’t take the photos yourself, the next best option is to find photographers and artists who are willing to share their images. Often all they ask for is attribution.
Faculty Websites now has a plugin you can activate that will allow you to search, download and embed photos directly from your WordPress website. It searches the Pixabay library and will download the images for you.
Activate the Pixabay Images plugin to get started
You will need to be an administrator on the website to be able to activate plugins.
Go to Plugins > All and look for Pixabay Images
Click the Activate button
How to add a Pixabay Image
Create or edit a Post or Page
If you are still using the Classic Editor, look for a Pixabay button next to Add Media.
If you using the Block Editor, you will need to use a Classic Block to search for and insert a Pixabay image.
Add a Classic Block
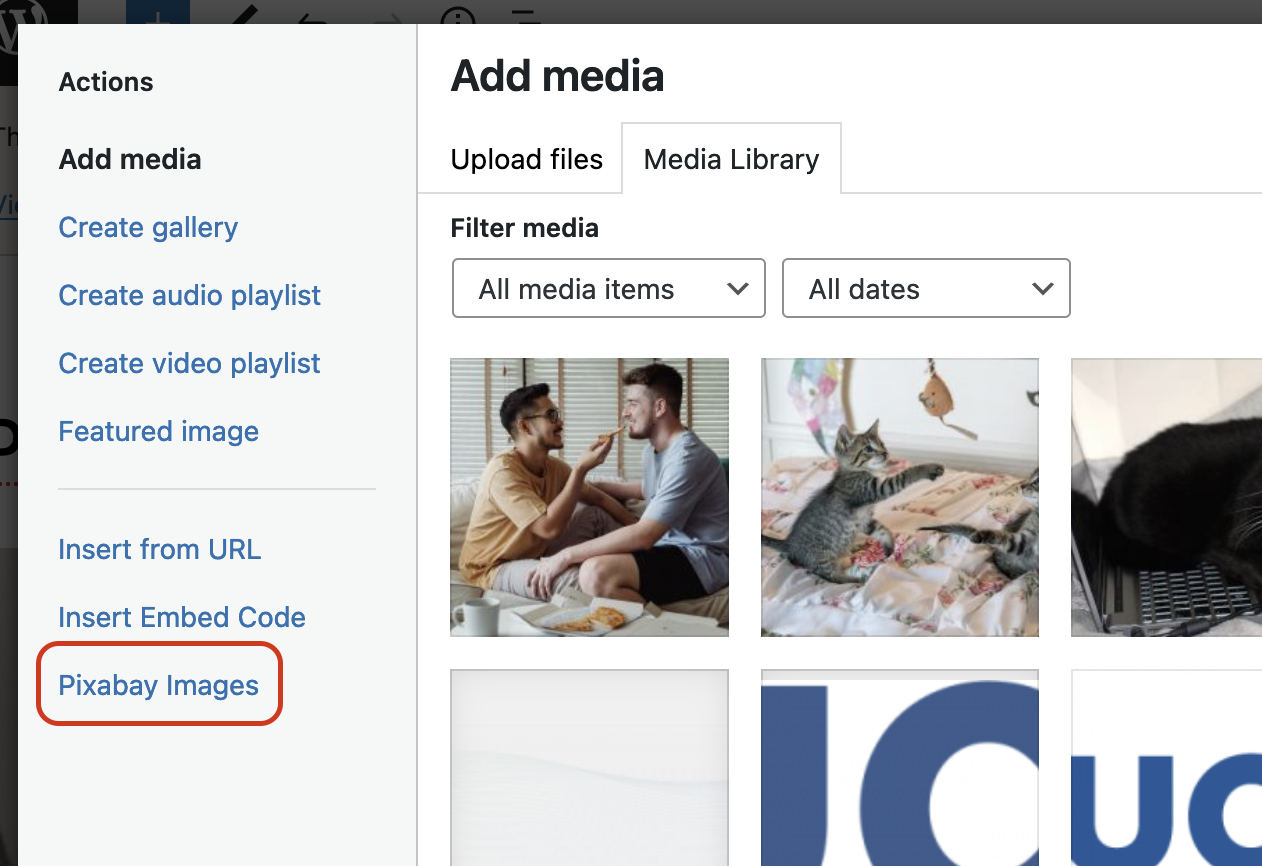
Click the AddMedia button. (It looks like a camera and musical note.)
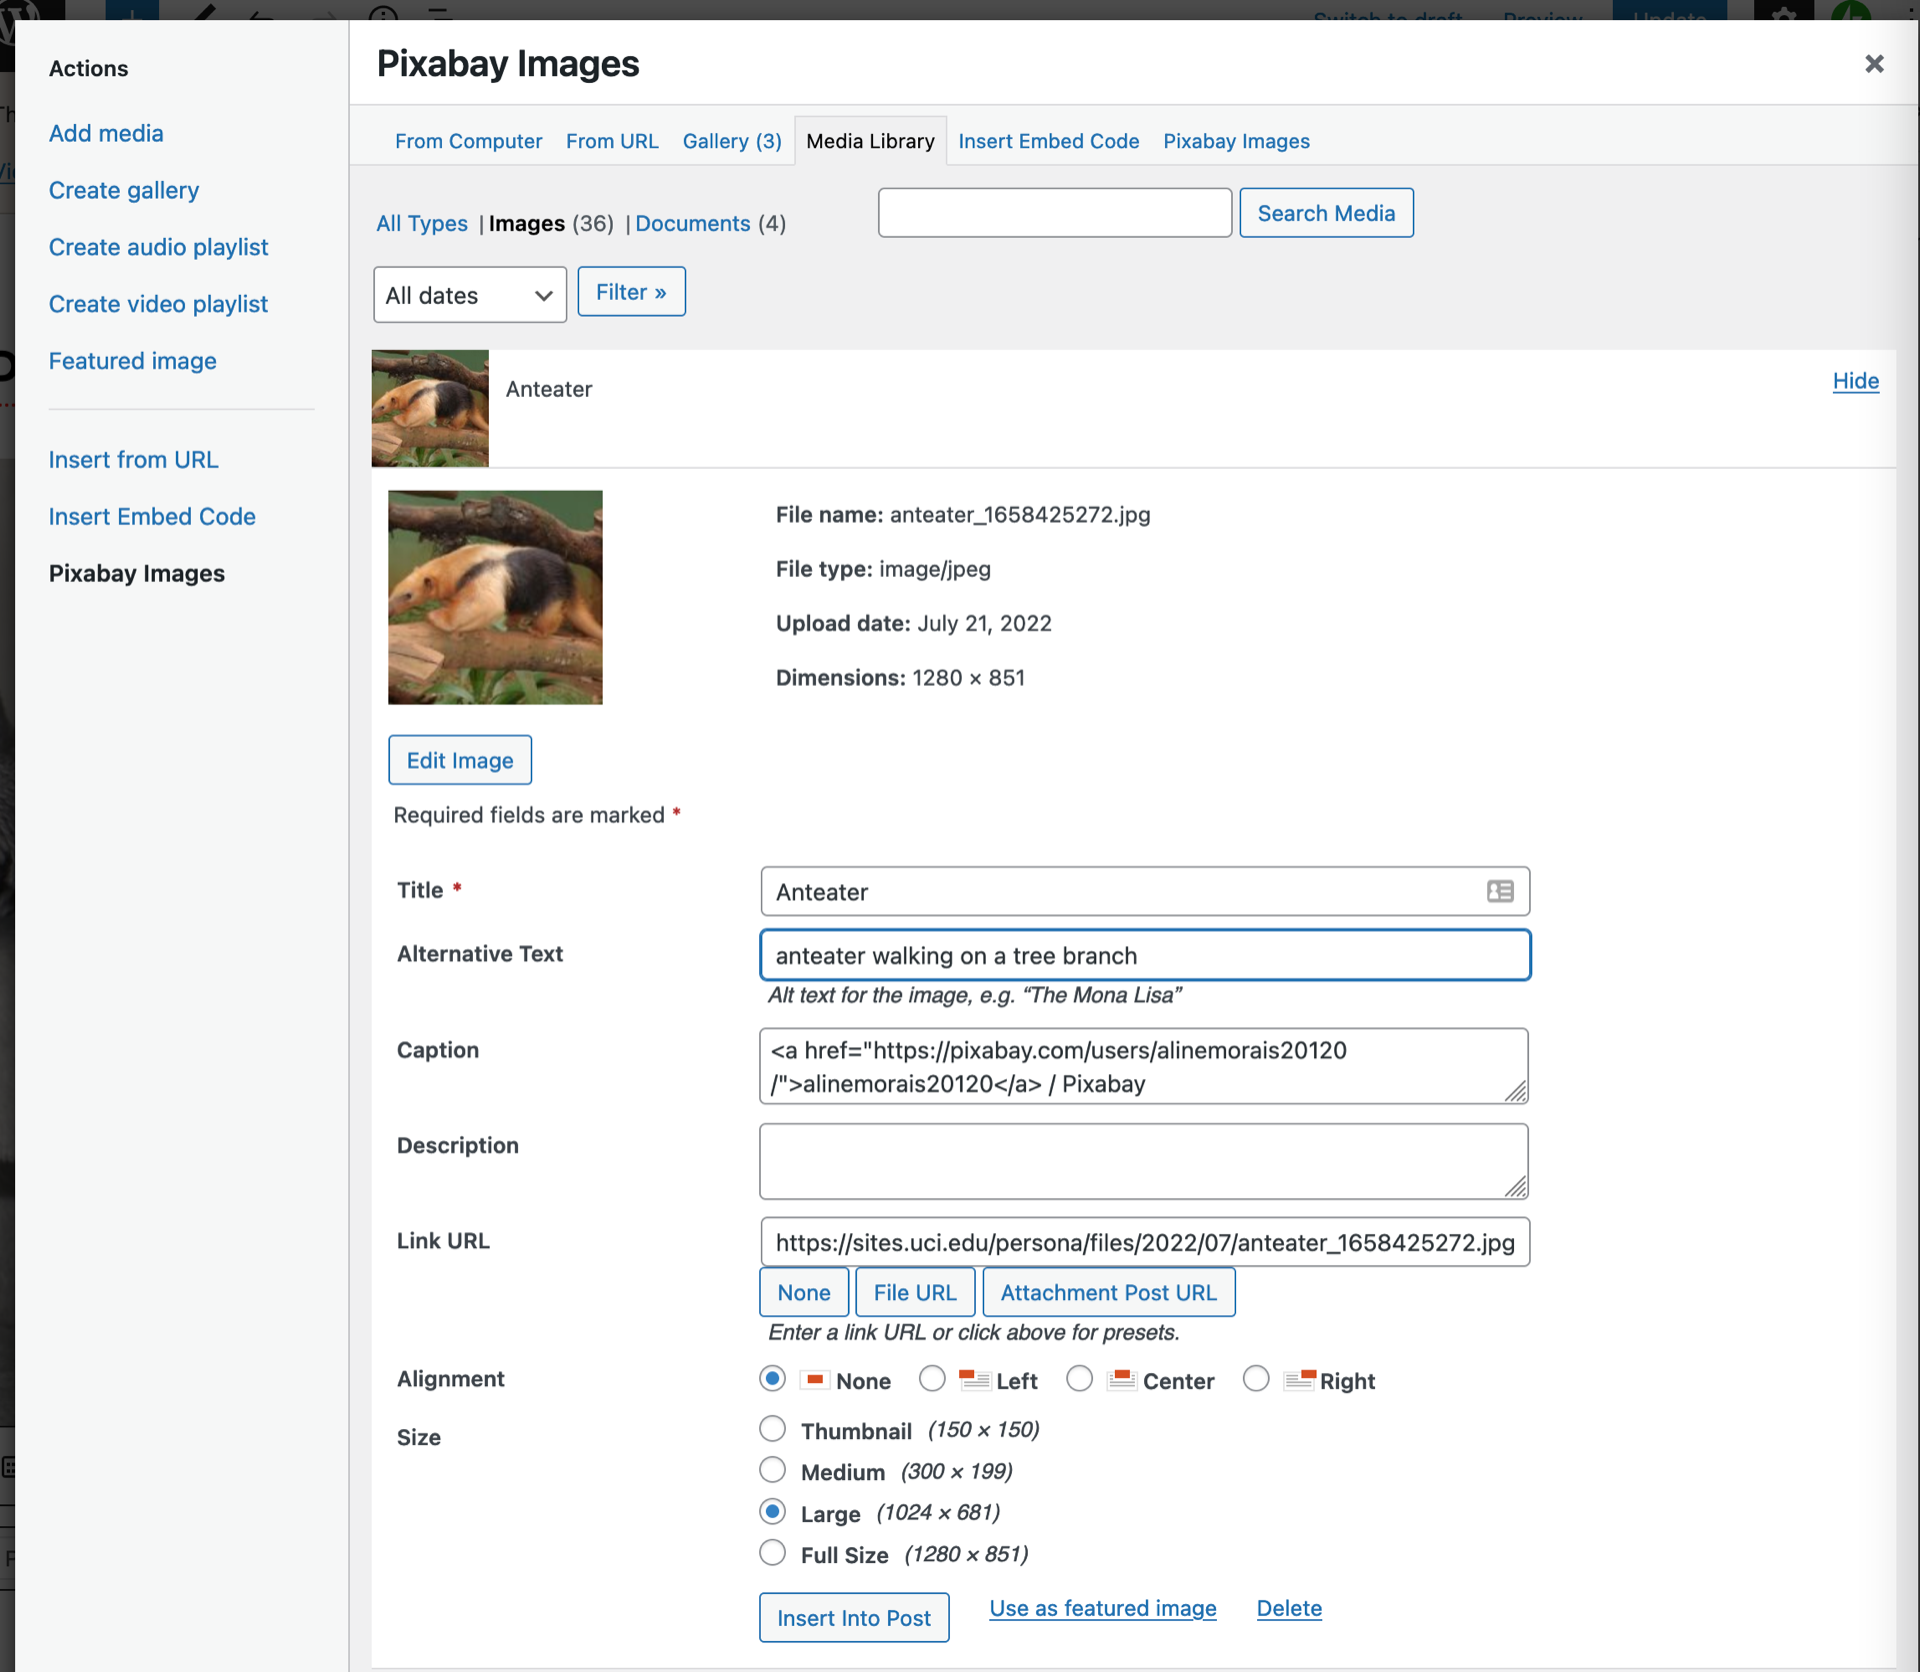
In the Add Media screen, click Pixabay Images in the left section.
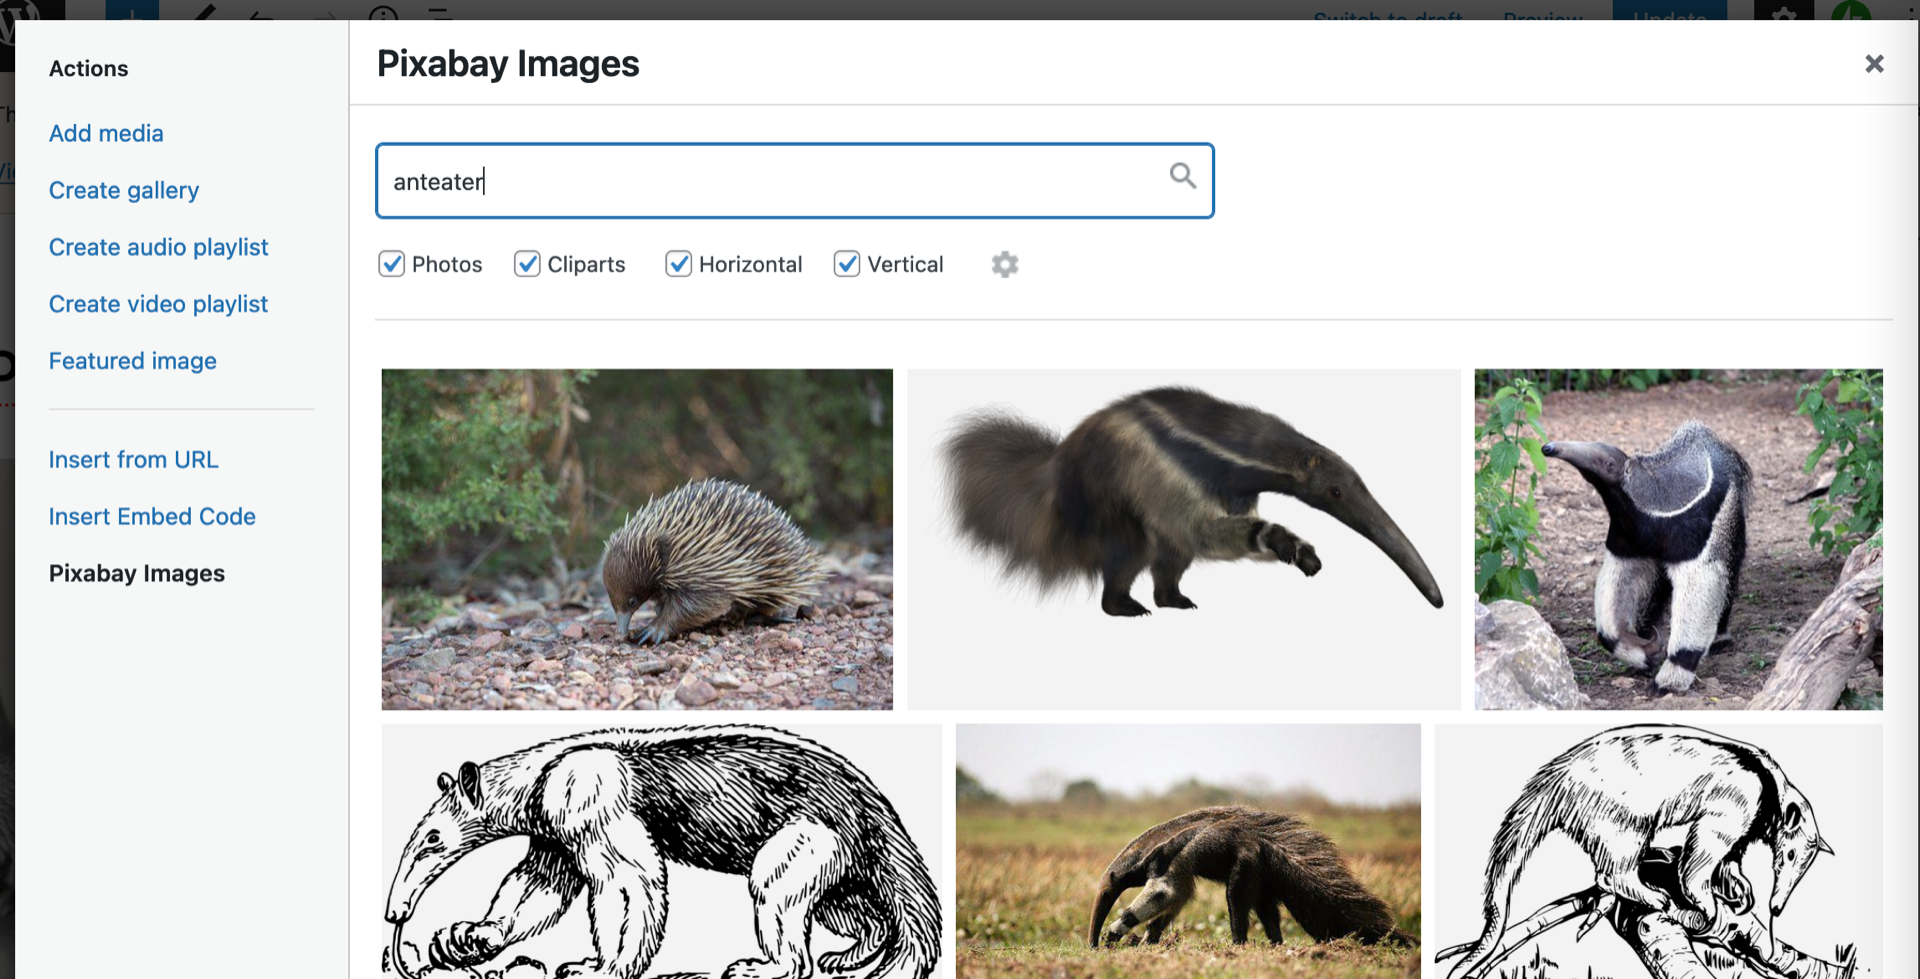
Type a search term and click Enter or click the magnifying glass.
The plugin will search Pixabay’s extensive library and return the results.
Find the photo you want to use and click on it to download.
Add in Alternative Text to make sure it is web-accessible!
Choose the size you want to use and click Insert Into Post.
The image will now appear on your page or post. The image will also be downloaded to your Media Library allowing you to re-use it on your website. Once downloaded you can use it on any block that uses images from your media library.
Faculty Websites has been upgraded to WordPress 6.0 “Arturo”.
It has nearly 1,000 enhancements and bug fixes and is the second major release in 2022.
Features and Improvements
Enhanced Writing Experience – You can now select text across multiple blocks. You can quickly add internal links by typing ‘[[‘. When you customize buttons, the new buttons will retain the style automatically.
Block Locking Controls – You can now lock your blocks. If you have a reusable block and don’t want it overwritten, you can now lock it.
Improved Performance – These enhancements cover a range of performance areas including improving the page and post-load speed, reducing the execution time of various query types, caching, navigation menus, and much more.
Improved Accessibility – WordPress 6.0 includes more than 50 updates specifically focused on enhancing the accessibility of the platform.
We have an optional plugin available called “A – Z Lists”. It’s an easy solution to add a large number of items in a filterable and searchable A – Z list. Create your list and the plugin will alphabetize the list for you.
Activate the A – Z Lists Plugin
Note: Only site administrators can activate plugins.
Go to Plugins > All Plugins
Find “A – Z Lists” and click the Activate button.
It’s now available on your site.
Add your list to a Page or Post
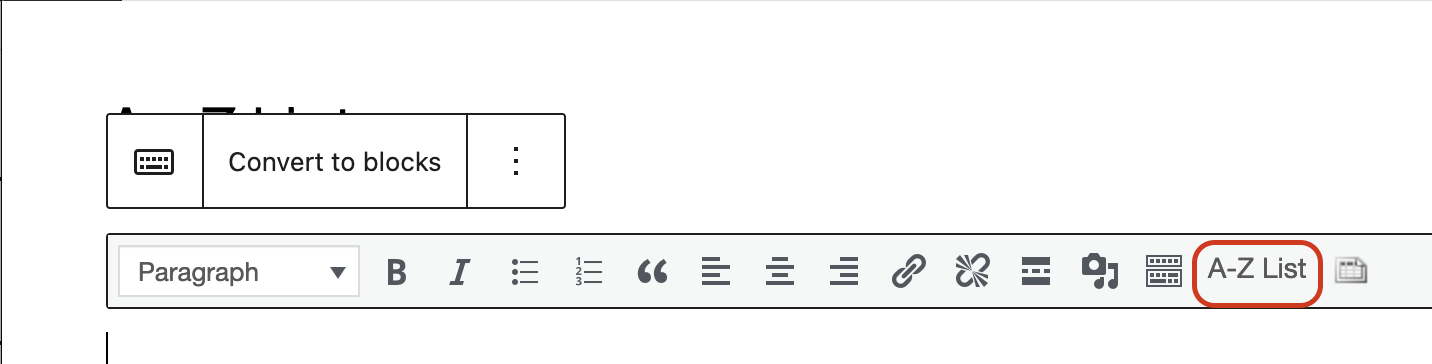
If you are using the Block Editor, you will need to use a “Classic Block” to be able to see and use the A-Z icon.
Click the A-Z icon in the editor. (If you are using the Block Editor, see the note above.)
Choose the type of list you want to use (ordered, unordered, none).
Choose the number of columns. The columns are the number of columns for each letter.
Check “Show menu with search bar and links to groups” if you want your readers to be able to filter the list based on letter and search the list.
Check “Show letter before start of each group” to display the letter automatically.
Click OK
Start typing your list. You don’t have to worry about alphabetizing the list, it will be sorted for you when you publish the content.
You can also link the list content. This could be a good index for your site, for example.
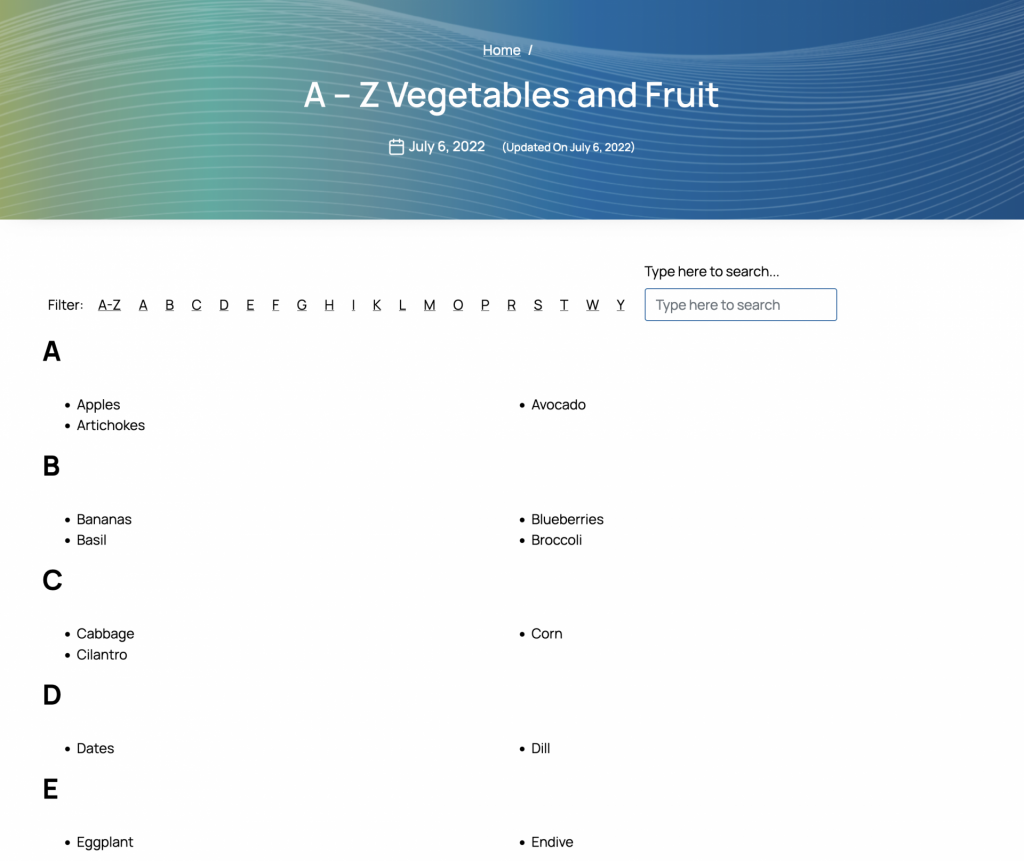
Example of an filterable and searchable, A – Z list.